Case studies: Supporting high quality products
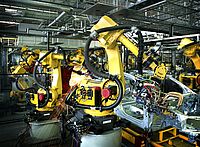
Ensuring that industries generating billions of euros for the European economy are competitive in global markets relies on manufacturing quality products. This relies on rigorous measurements to ensure parts match specification, and often involves monitoring for chemical contamination either on the product itself or in the production environment. A robust measurement infrastructure with rigorous links to SI units is a key element in delivering production quality from researching new materials, to delivering components meeting specifications, to ensuring that the finished product is fit for purpose.
Measuring nanoparticle exposure
Nanoparticles are a subject of intense scientific and technological interest in many industries, from medicine to electronics. The global annual nanomaterials market is already worth about €20 billion, exploiting unusual properties of these tiny, highly functional materials. Some nanoparticles may be toxic but there’s no way to reliably measure exposure. Lack of traceable methods to measure dosage reduced confidence in instrumentation, so impeded the development of new applications.
Assessing ultra-high vacuum quality
Ultra-high vacuums are essential in many manufacturing processes, including the complex electronics and coatings that are increasingly used in microand nano-technologies. Achieving the extremely low operating pressures these processes require, relies on removing damaging contamination traces produced by system component outgassing. Reliable measurements of both the ultimate pressures reached and the outgassing rates of ultra-high vacuum
components are needed to ensure system efficiency and reliability.
Expanded humidity measurement capabilities
Controlling humidity is critical for maintaining product quality in pharmaceutical manufacturing and many other high-value industries. The accuracy of humidity measurements can be assured where networks of accredited instrument calibration service providers are available, that are supported by national metrology institutes able to respond to rising expectations. However, in some of Europe’s emerging economies, these institutes were unable to fully support local calibration service providers, holding back industrial development in these nations.
INNOVATION FOR CLEANROOM MONITORING
Complex manufacturing processes, such as those used to make semiconductors and high-power LEDs, rely on cleanroom production facilities where air quality is strictly controlled. As components shrink and production becomes more susceptible to extremely low contamination levels, improved monitoring methods are needed to reliably detect changes in air quality.
KEEPING CLEANROOMS CLEAN
Semiconductor production relies on precise control during cleanroom manufacturing processes. Chemical spills can contaminate the air and reduce the effectiveness of these highly sensitive industrial processes, leading to parts being scrapped. As semiconductors become smaller, improved detection of extremely low levels of contamination in real time is needed to quickly identify traces of airborne chemicals and allow remedial action to sustain production efficiency and yield.
Harmonising pre-pack verification tests
Automatic weighing creates confidence in goods matching production specifications. This is underpinned by legal enforcement of national regulations for instrument verification and quality assurance based on SI traceability. National Metrology Institutes participate in both these processes, but a skills gap exists between long established and emerging EU NMI. Closing this by developing best practice in automatic weighing instrument calibration will create greater harmonisation in trade across the EU.
Enforcing vehicle weight restrictions
The safety of our road infrastructure is being challenged by heavy lorries that exceed bridge load bearing capacities, so endangering the public. Traffic law enforcement agencies must identify and apprehend offenders and can issue heavy fines as a deterrent to further violations. Weighing-in-motion technologies embedded in the road surface offer a fast method for identifying overladen vehicles, but their weighing accuracy needs improvement for wider
enforcement of vehicle weight limits.
TEMPERATURE AND FRICTION TESTING
Understanding how engineered surfaces respond to friction is important in many applications where wear affects in-service performance. During friction measurements testing probes can create high temperatures at the point of contact with the material, affecting test accuracy. Developing ways to measure these temperatures will improve understanding of how friction affects surfaces in use, speeding the development of new products such as lighter weight vehicles and longer lasting mine drills.
PLASTIC DEFORMATION TESTING
Materials producers want to develop plastics with enhanced properties for new industrial applications. At the same time, they want to reduce environmental impact by recycling plastics into new products. Both goals make production more complex. To advance research into innovative and more environmentally friendly plastics, new methods are needed to better understand the dimensional and mechanical properties of plastics and how they change during their life.
VALIDATING HIGH-PERFORMANCE POLYMERS
Polymers offer advantages from reduced weight to precise shape manufacture and are widely used in many applications. However, their effective use in specialist precision products has been hampered by a lack of reliable data detailing their mechanical properties and small-scale surface features. Improvements to the profilometers used to measure polymers, and the data they provide would support their uptake in high value applications.
3D SURFACE WEAR IMAGING
Precision manufacturing industries rely on highly precise cutting and milling tools - small chips or grooves in these can mean products fail to meet specification, leading to re-work costs and delays. Designing more durable tools requires an improved understanding of how surfaces wear in use. Accurate, non-contact measurement methods and 3D imaging will improve research into such surfaces, but these techniques require improved traceability to provide confidence in their use.
NON-DESTRUCTIVE SURFACE MEASUREMENTS
Materials and chemical producers require detailed knowledge of surface chemistry for research into new products. One way to understand a surface without damaging it is to bombard it with an electron beam, causing its atoms to emit characteristic X-rays enabling identification. The measurement of these must be precise as many elements emissions are close in energy – traceable reference materials will ensure instruments using this technique are stable and accurate.
MEASURING ORGANIC LAYERS
Many innovative products - from touchscreens to solar panels to pharmaceuticals – utilise multiple organic layers to create complex functionality. New techniques have been developed to remove and measure layers individually enabling improved product development and assisting with quality assurance. However, manufacturers cannot be certain of the depth of layer being removed and new reference materials for these techniques are needed to increase uptake and remove a major barrier to innovation.
PRECISION FOR COMPLEX DRUG LAYERS
Manufacturing complex layered structures, for example drug delivery mechanisms on medical implants, relies on chemical interactions to deliver functionality. Advanced analysis methods confirm chemical layer performance at all stages of the production process from research through to confirming the quality of finished products. Complex functional layers are used in long-term medical implants but to optimise patient outcomes greater accuracy for analysis methods is needed.
ENSURING MEDICAL IMPLANT SAFETY
Manufacturing complex layered structures for drug delivery mechanisms on medical implants, relies on chemical interactions to deliver functionality. Advanced analysis methods confirm chemical layer performance at all stages of the production process from research through to confirming the quality of products. Greater accuracy for surface chemical analyses is needed to ensure they work as expected and, in the case of medical devices, is essential for patient safety.
MODELLING MATERIAL CHANGE
Manufacturers need to understand the surface properties of new materials and coatings before these can be incorporated into innovative products. However, a whole range of measurements are needed to fully characterise surfaces. This can be time consuming as often only a single parameter can be ascertained by an individual type of test. Therefore models relating different surface properties to each other are needed to deliver lifetime in-service performance predictions.
NEW STANDARDS FOR NANO-TESTING
Nanomaterials have a range of desirable properties such as increased strength, high elasticity and electrical conductivity making them desirable for use in a large range of applications. These properties are being used to develop the next generation of products in the transport, energy and manufacturing industries. However, while the properties of nanomaterials are attractive, they are not always well understood, and manufacturers need standardised methods to assess their performance.
NANOSCALE SURFACE MAPPING
Manufacturers of nano-materials, such as those used in semiconductors and solar cells, need accurate tools for quality control. Knowing precisely where on a sample’s surface measurements are being made and having confidence in the results achieved are key to reliably characterising material properties. Atomic force microscopy has great potential for use in material science, but problems associated with extended measurement run times and instrument drift need to be overcome.
ULTRA-SENSITIVE TEMPERATURE SENSORS
The world’s leading manufacturing companies, from IT to aerospace, need ever smaller, more precise parts. A barrier to such innovation is that, at this level of precision, process control instrumentation can be affected by small variations in temperature effecting the specification of end-products. By measuring ambient temperatures with ultra-sensitive thermometers, manufacturers will be able to identify links between machine inaccuracies and temperature fluctuations, and develop compensation methods to offset them.
New instrument for high voltage tests
Electricity is transmitted from its point of generation at high voltage of 115 kV or above to minimise losses over long distances. Each element of the network requires testing to ensure sufficient robustness to withstand these levels as well as the environmental factors encountered during normal operation. System voltages are set to increase in the future and new measurement instruments are required to prevent power disruptions caused by component failure.
MAINS ADAPTER BOOSTS COMPETITIVENESS
The European electrical industry produces 700 billion euros worth of goods annually and employs four million people, making it one the EU’s largest industries. This sector has an excellent reputation for high quality and reliable products underpinned by compliance with the EUs Electromagnetic Compatibility Directive. An accreditation scheme enables labs to demonstrate compliance with the directive’s requirements but validating their testing requires improved methods to reliably confirm performance.
SURFACE ANALYSIS FOR ALZHEIMER’S
Modifying or controlling surface chemistry is important in new product development, quality control and research. This is particularly true where functionality of surfaces, thin films and interfaces are key to the application, such as organic solar cells and devices for medical diagnostics. Surface chemical analysis aims to provide quantitative elemental, chemical state and functional group information from the surface of materials, but requires comparable test data and improved measurement traceability.
